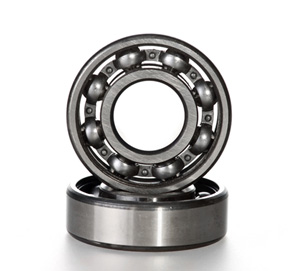
Clean Ball Bearings
How to Clean Ball Bearings
Ball bearings in many types of applications require maintenance, and this includes proper cleaning and re-lubrication. Proper bearing upkeep can greatly improve the operating life of the bearing, as dirt and grime can cause damage or diminish bearing performance. The cleaning process is an important one, as bearings can easily be damaged if they are mishandled.
Depending on the industry, different bearings need different levels of maintenance. People most commonly need to clean wheel bearings, such as those on a car, bicycle, or skateboard. If it’s time to clean your bearings, follow these simple steps:
Remove the Bearings
Of course, if you’re going to clean your bearings, you will need to remove them from the shaft or housing. Depending on where the bearings are located, this could be as simple as removing a nut. You may just need a wrench or a screwdriver for this step.
To avoid unwanted mess, wear thin rubber gloves or keep a lint-free rag handy to avoid getting grease on your hands. Make sure the tools you are using are clean to avoid getting any sediment into the bearings.
Related content:
Remove the Shields
The bearing likely has a metal or rubber shield to protect the balls and cage, and this will need to be removed. Use a thin razor or similar tool to carefully remove the shield; it can easily be damaged during this process. For metal shields, there is a c-clip that also needs to be removed.
For some bearings, you may want to remove the cage and balls as well, if possible. This allows you to clean them independently and get out as much grime as possible, but may not be necessary for something like skateboard bearings. When removing and handling the cage, be cautious not to pop out some of the individual balls, as they can be difficult to replace.
Clean the Bearing
There are multiple effective methods for the actual cleaning process, depending on the materials or time you have available.
One option is to use a spray can of degreaser, using a fine straw to fill all the crevices of the bearing. This may take a few minutes, and you want to fill and turn the bearing continuously to ensure it is completely clean.
Another option is to soak the bearings in a recommended solvent. For this process, it is preferred to place the bearings in a metal basket or suspended on metal wire within the solvent container, rather than placing them directly in the container. This avoids contact with any dirt or sediment that may be in the bottom of the container, to ensure complete cleaning. Acceptable solvents include degreaser, methylated spirit, gasoline, or isopropyl alcohol. Soak the bearings for as long as possible, preferably overnight. Gently shaking the container can help to break up some of the dirt, as long as you are not damaging the bearing in any way.
After soaking, rinse the bearings in the solvent once again, to effectively remove any sediment or grease.
Dry the Bearing
After all of the dirt and grease has been removed, you will need to dry the bearing completely before re-greasing. The most effective method is to set them out on a flat surface to air-dry, however this can take many hours. You can use a can of compressed air or similar method to shorten the drying process, however it is critical that the bearing does not spin. Without any lubrication, spinning the bearing can cause immediate damage and wear. You also may want to wear eye protection in case any loose sediments are removed during the process.
For individual cages, you can use a clean, lint-free rag and gently dry the cage this way as well.
This is a great opportunity to inspect the condition of your bearing. The bearing should be a shiny or dull silver, and all of the balls should look uniform, if you can see their shape. If there are any deformations, or the bearing is black or dark gray, you should consider replacing the bearing altogether.
Re-grease the Bearing
If your bearing seems to be completely clean, dry, and in acceptable condition, you can add new grease. Be sure to use more than enough grease during this process, and work it into the bearing thoroughly, to ensure that there are no dry points of contact within the bearing.
If you are inserting the cage back into the bearing, make sure the cage is fully covered in grease to avoid any holes being created or metal to metal contact. Additionally it is critical that the cage is placed in the correct position, otherwise the bearing will not function.
After greasing, the bearing is ready to be reinstalled. If you are not immediately installing the bearing, make sure it is properly protected in a waterproof wrapper and stored in a safe location.